Never-Fail 4-Ingredient Creamy Peanut Butter Fudge
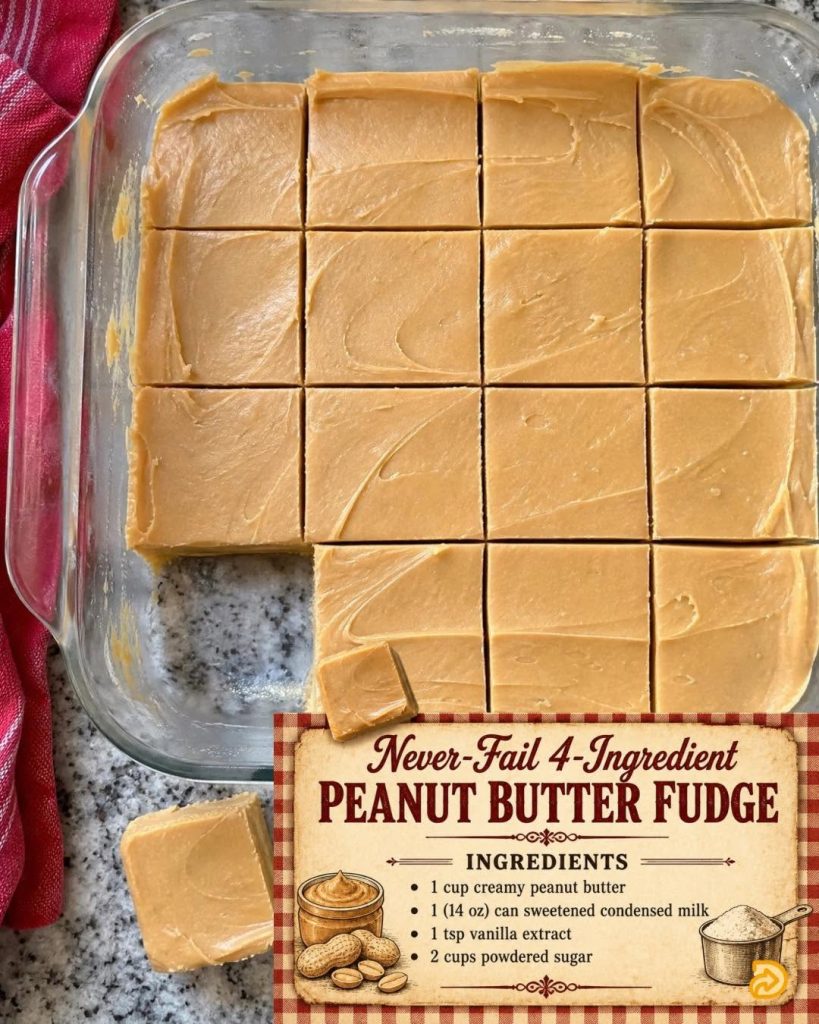
👩🍳 Step-by-Step Instructions
Step 1: Pan Preparation (The Sling Method)
- Lightly grease an 8×8-inch baking pan with a tiny smear of butter or cooking spray. This acts as “glue” for your paper.
- Cut a sheet of parchment paper to fit the width of the pan, leaving an extra 2 inches of overhang on two opposite sides. Press the paper firmly into the pan. This creates a “sling” that allows you to lift the entire block of fudge out cleanly once it is set, ensuring perfect, straight-cut squares.
Step 2: Combine and Smooth the Base
- In a medium, heavy-bottomed saucepan, combine the 1 cup creamy peanut butter and the 14 oz can of sweetened condensed milk.
- Place the pan over low heat.
- Stir constantly with a sturdy silicone spatula. Do not rush this step with high heat, or the milk sugars will scorch on the bottom of the pan. Warm the mixture gently just until the peanut butter melts and completely incorporates into the condensed milk, creating a glossy, uniform, and smooth liquid base (about 3 to 4 minutes).
- Alternative Microwave Method: If you prefer not to use the stove, combine both ingredients in a large microwave-safe bowl. Microwave on medium power in 30-second bursts, stirring thoroughly between each burst, until smooth and warm.
Step 3: Flavor and Build Structure
- Immediately remove the saucepan from the heat source and set it on a heat-safe surface.
- Stir in the 1 teaspoon of vanilla extract. The mixture may hiss or bubble slightly; keep stirring until the vanilla is fully incorporated.
- Begin adding the 2 cups of sifted powdered sugar about a half-cup at a time.
- Stir vigorously after each addition. The mixture will quickly become very thick, heavy, and a bit difficult to turn—this is exactly what you want. Continue folding and pressing the dough until all the sugar is absorbed and no white streaks or pockets remain.
Step 4: Press and Mold
- Scrape the warm, thick fudge mixture out of the pot and into your prepared 8×8-inch pan.
- The Smooth-Top Trick: Because the fudge thickens so rapidly, pressing it flat with a spoon can leave a bumpy surface. To fix this, place a fresh piece of parchment paper or wax paper directly over the top of the warm fudge. Use the flat bottom of a measuring cup or your hands to smooth and press the fudge firmly and evenly into all four corners.
- Peel away the top piece of paper, leaving a perfectly flat surface.
Step 5: Chill and Set
- Place the pan uncovered into the refrigerator to chill.
- Let it sit for at least 2 hours, or until the fudge is completely firm and cold to the touch.
Step 6: Clean Cuts and Serving
- Once firm, run a butter knife along the two un-papered edges of the pan to loosen them.
- Grasp the overhanging parchment paper “sling” and lift the block of fudge cleanly out of the pan, placing it onto a cutting board.
- For clean, professional slices: Fill a tall glass with hot tap water and dip a sharp chef’s knife into it. Wipe the blade dry with a towel, then make your first slice. Wipe the blade clean and re-dip it in hot water before every single cut.
- Slice the block into a 6×6 grid to yield 36 perfectly sharp, bite-sized squares. Serve immediately.
💡 Pro-Tips for Perfect Fudge
see continuation on next page
