How to Propagate a Christmas Cactus: A Step-by-Step Guide
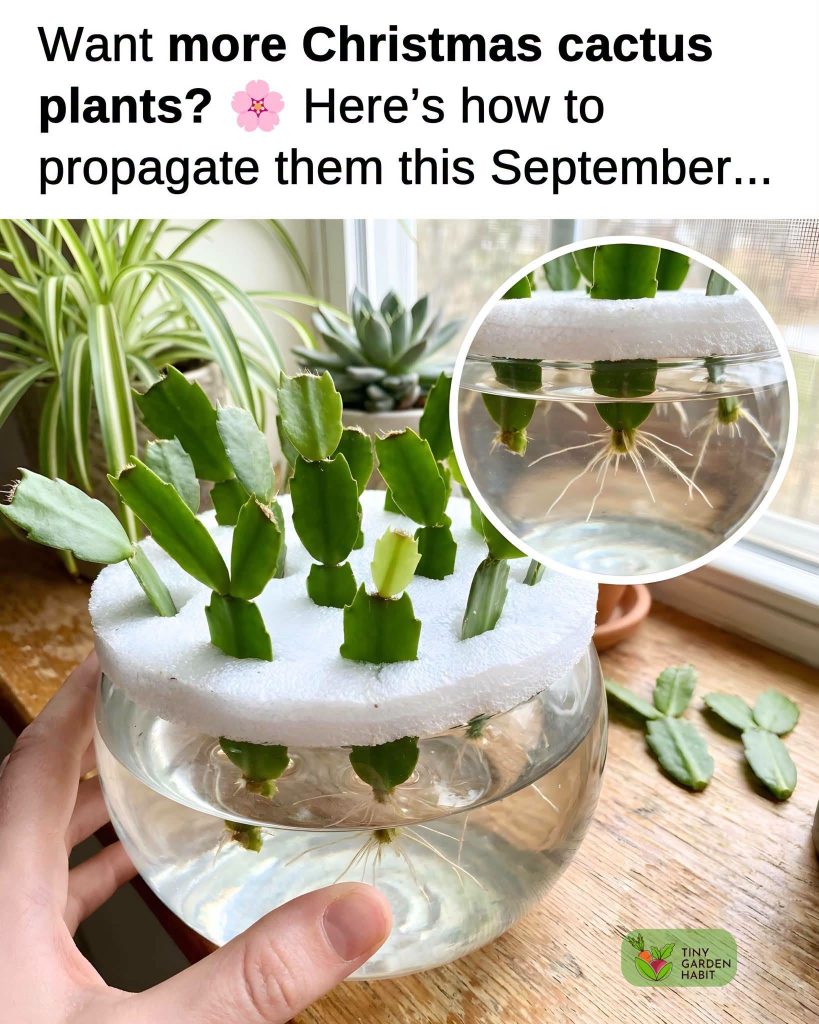
For many people, propagating a Christmas cactus is one of the most difficult and complex things they can do. For seasoned gardeners like me, it’s just another Monday afternoon task.
So, what’s the secret to taking a challenging task like propagation so calmly? Simple: I’ve propagated my Christmas cactus countless times over the years. With experience comes confidence.
Today, I’ll be teaching you how you can propagate your Christmas cactus the easy way, so next time you’ll approach it with the same calm confidence too. Let’s dive right into it!
How to Propagate a Christmas Cactus: A Step-by-Step Guide
Step 1: Choose a Healthy Parent Plant and Timing
The first step towards a successful propagation job starts with choosing the right parent plant. The right parent plant is:
When you take cuttings from a healthy parent plant, the chances of growing a defective Christmas cactus are greatly reduced. It ensures your plant’s health and safety in the initial stages of growth.
Step 2: Take Stem Cuttings
Because of how delicate and easy-to-break Christmas cacti are, you won’t really need pruning shears or scissors for this. Gently twist off a stem that has 3-4 healthy-looking leaves on it and use it for propagation.
Remember to be gentle and not damage the rest of the plant by pulling too hard and possibly risking root injury.
Step 3: Prepare the Pot and Soil
When it comes to the pot, use whatever pot you have available at home, even if it’s on the slightly smaller side. We’ll be transplanting the Christmas cactus in the end anyways.
For soil, play with a mix of generic potting mix, perlite, and some sand. This blend should create the ideal growing environment that supports healthy root development and limits potential waterlogging problems.
In the images I’m showing, you’ll see a Thanksgiving cactus being used for demonstration purposes, but don’t worry, the propagation process is exactly the same for your Christmas cactus. Just follow the same steps!
Step 4: Plant the Cuttings
Once your pot and soil are ready, plant your cuttings carefully. Personally, I’d suggest letting your cuttings dry out completely before you plant them, as it limits the chances of fungal disease.
Plant your cuttings cut side down, and avoid burying them in the soil all the way. Just halfway deep should be good enough. The cuttings should remain upright and not tip over, or else, growth may be a little deformed.
Step 5: Water and Care
Now comes the most important part, caring for your cuttings. The fact of the matter is that growing cuttings require a lot more love and attention compared to fully matured Christmas cacti. They’re young, delicate, and do not handle neglect very well.
It’s important that you timely fulfill their needs and remain consistent where you can.
Step 6: Watch for Root Development
see continuation on next page
